
How to Apply A3 UV DTF Transfer Film
How to Apply A3 UV DTF Transfer Film
UV printing is a popular printing technique that has gained immense popularity in recent times. The technology used in UV printing has revolutionized the printing industry, allowing for faster printing speeds, better image quality, and more versatility in printing on a variety of materials.
In this blog, we will discuss the basics of UV printing and the various applications of UV printing, and some of the materials that can be printed using this technology.
Get ready to create your first UV project!
1: The product will arrive with 100 “A” sheets and a roll of “B” transfer film.

2: Set the “B” roll of transfer film in your laminator.

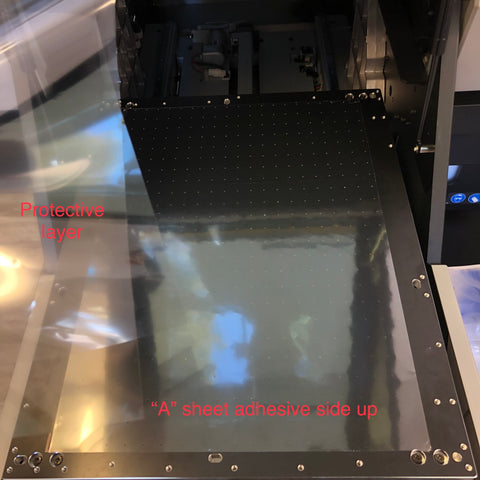
3: The “A” sheets are coated in an adhesive material. Simply peel the protective layer off the “A” sheet and then place the “A” sheet in your printer with the adhesive side up.
4: Print directly onto the adhesive side of the “A” sheet with your UV printer. When the print is finished, remove the “A” sheet and bring it over to your laminator.


5: Set the laminator to 100 degrees Celsius and set the speed to 5 or lower.

6: Run the “A” sheet through your laminator (with the roll of “B” transfer film already loaded), adhesive/print side up.

7: When your “A” sheet is finished laminating you can then cut out your individual graphics.

8: To apply, separate the “B” transfer film from the “A” sheet. The graphic will transfer over to the “B” film along with all the adhesive from the “A” sheet, this is normal. Now you will be able to firmly apply your graphic to your product. ( Ex: Tumbler, Wine Bottle, Glass, Ect…)

9: When applying your graphic to the product, focus pressure on the graphic only. Application pressure does not need to be applied where there is no graphic. After applying your graphic, carefully start to peel the “B” transfer film off, leaving only the graphic remaining on your product.


10: You have just created your first project using the A3 UV DTF Film! Nice Work!


